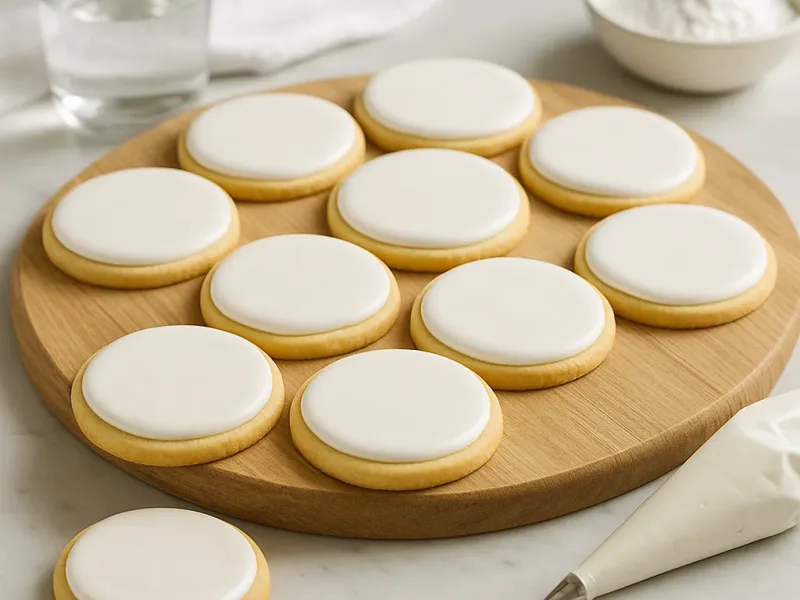
Base recipe: 12 cookies
Your kitchen companion
Ingredients
Check off ingredients as you prepare them.
Follow the steps at your own pace.
Method
Combine dry ingredients: Place 4 cups powdered sugar (480 g) and 3 tbsp meringue powder (30 g) into the bowl of a stand mixer. Use the whisk attachment. Mix on low speed for 15 seconds until fully blended. The mixture will look light and uniform.
Add liquid gradually: Pour in 6 tbsp warm water (90 ml) slowly while the mixer runs on low speed. Increase to medium speed once all the water is added. Mix for 3 minutes until the icing becomes thick, glossy, and smooth. It should form soft peaks when lifted.
Adjust consistency: Add 1 tsp lemon juice (5 ml) and mix 10 seconds. For outlining, keep icing thick and slow-moving. For flooding, add 1–2 tsp water (5–10 ml) until the icing flows in a smooth ribbon and settles flat within 10–12 seconds.
Remove air bubbles: Let the icing rest for 10 minutes. Small bubbles will rise to the top. Stir gently with a spatula to avoid introducing new air. The surface should look glassy and even.
Color the icing: Divide icing into small bowls. Add gel food coloring a tiny amount at a time. Stir slowly until color is uniform. Avoid liquid coloring because it thins the icing. The mixture should appear vibrant with no streaks.
Prepare piping bags: Fill piping bags fitted with small round tips (No. 2 or No. 3). Keep unused icing covered with plastic wrap touching the surface to prevent crusting. The texture should feel smooth, not dry.
Test consistency: Pipe a small line on parchment. Outlining icing should hold shape with firm edges. Flooding icing should spread but stay within the outline. If the line breaks easily, add ½ tsp water (2–3 ml). If too runny, whisk in 1 tbsp powdered sugar (12 g).
Apply icing to cookies: Outline cookies using thicker icing. Wait 2 minutes, then add flooding icing inside the outline. Use a toothpick to guide the icing into corners. The surface will self-level to a smooth finish.
Dry the cookies: Let decorated cookies dry uncovered for at least 12 hours at room temperature. They should feel firm to the touch with a clear shine. If the surface transfers color when touched, dry 2 hours longer.
Store finished icing: Keep leftover icing in airtight containers with plastic wrap pressed onto the surface. Refrigerate up to 4 days. Stir gently before using. Texture should return to silky and even.
Extra technique, safety notes and details when you want to go deeper.
More tips & details
Mastering a Smooth-Drying Royal Icing for Perfect Cookie Decorating
A refined, professional guide to achieving flawless texture and lasting structure
A glossy coating that dries into a perfectly smooth finish transforms decorated cookies from simple treats into polished, bakery-worthy creations. Royal icing offers exceptional control, allowing clean outlines, crisp details, and an elegant sheen that holds its shape without cracking. When mixed with care, the icing becomes a versatile medium—thin enough for smooth flooding, firm enough for delicate designs, and stable enough to maintain its color and structure even after long drying times. Its ability to dry into a beautiful, firm surface makes it ideal not only for sugar cookies but also for gingerbread pieces, intricate decorations, and long-lasting edible accents.
The balance between powdered sugar, egg whites or meringue powder, and liquid determines how the icing behaves. A slightly thicker mixture is ideal for precise lines and lettering, while a more fluid version creates that coveted mirror-smooth surface. The natural whiteness of the base allows vibrant colors to shine, and the high sugar content gives it excellent stability. Proper whipping introduces just enough air to create a fluffy yet controlled texture, while overmixing can lead to bubbles or a brittle finish. Resting the icing briefly before applying helps release trapped air for a cleaner result.
Royal icing’s roots trace back to European royal banquets, where ornate sugar decorations signaled luxury and craftsmanship. Over time, this icing evolved from elaborate showpieces into a staple for home bakers who value precision and artistry. Its strong drying properties made it a favorite for gingerbread structures and holiday cookies, and its adaptability continues to inspire modern decorative techniques. Even today, the icing remains a symbol of festive creativity, blending tradition with timeless craftsmanship.
Ingredient Dynamics for a Smooth-Drying Finish
Different components shape the final texture.
- Powdered sugar provides structure, sweetness, and the smooth finish essential for flooding.
- Egg whites or meringue powder give the icing strength and allow it to dry firmly while retaining a silky consistency.
- Liquid controls thickness, helping create a custom consistency for outlining or flooding.
- Acidic ingredients like lemon juice can brighten flavor and help stabilize the mixture.
- Colorings work best in gel form to avoid thinning the icing and maintain clean saturation.
Together, these elements create an icing that dries with a clean, even sheen, making it ideal for detailed decorating work.
Why you’ll love this recipe
- Produces a smooth-drying finish ideal for intricate designs
- Adapts easily to outlining, flooding, and detail work
- Sets firmly for stacking, packaging, and gifting
- Creates clean, vivid colors without graininess
- Reliable texture suitable for both beginners and professional decorators
Crafting a Consistent, Professional Result
Achieving a flawless finish relies on technique: steady whisking, controlled hydration, and careful handling all influence the final look. Letting the icing rest allows micro-bubbles to rise, reducing surface imperfections. Covering the mixture properly prevents crusting, ensuring consistent texture throughout decorating. Working in small batches helps maintain the ideal viscosity, especially when switching between outlining and flooding phases. Even ambient humidity can play a role, affecting drying time and the final shine.
Storage and Make-Ahead
This icing stores exceptionally well when handled correctly.
- Transfer to an airtight container to prevent crusting on the surface.
- Press plastic wrap directly onto the icing before sealing to maintain smoothness.
- Refrigerate for short-term storage to preserve freshness and stability.
- Allow the icing to come to room temperature before remixing gently to restore consistency.
- For longer storage, keep the dry ingredients pre-mixed and add liquid only when needed for decorating sessions.
When prepared ahead, the icing maintains its structure and reliability, making it ideal for large decorating projects or festive baking days.
Structural Properties of Decorative Icing
Royal icing behaves as a refined sugar-based medium with controlled viscosity, allowing predictable flow and shaping. Its drying process forms a stable crystalline structure, giving finished decorations smooth surfaces and impressive durability. This makes it particularly suitable for cookies that will be packaged, shipped, or used as decorative elements for seasonal displays.
Festive baking often leads to new ideas and creative combinations, and exploring complementary recipes can inspire even more decorating possibilities. For a beautifully simple base that pairs perfectly with smooth-drying icing, consider trying these cookies next: Sugar Cookies Recipe with Easy Icing
Finishing Touches for a Perfect Result
A smooth-drying royal icing elevates any decorated cookie with its refined texture, clean lines, and flawless sheen. Its balanced structure—built from powdered sugar, meringue powder, and just enough liquid—creates a consistency that responds beautifully to outlining, flooding, and delicate detailing. Even beginners can achieve professional results thanks to its predictable behavior and forgiving adjustments. The gentle sweetness allows colors to shine without overpowering the cookie beneath, making every design stand out with precision and charm.
This icing also suits a wide range of decorating styles. Whether piped into intricate lace patterns, layered into dimensional accents, or simply flooded across a classic sugar cookie, it dries into a crisp surface that holds up well for packaging, gifting, and display. Its ability to set firmly yet remain pleasantly light offers both aesthetic and practical benefits, especially during busy baking seasons.
Practical Advantages and Adaptable Use
The formula adapts easily for different dietary needs. A switch to aquafaba creates an egg-free version with nearly identical performance, while the naturally gluten-free base makes it suitable for many guests. Its quick preparation time—usually under 20 minutes—helps streamline decorating sessions without sacrificing quality. A short resting period improves smoothness, ensuring a glossy finish that feels effortless once applied.
Long drying stability means decorated cookies stay pristine for days, making this icing ideal for holiday platters, wedding favors, bake-sale packaging, or intricate themed collections. Its versatility encourages creative exploration, from soft pastels to vibrant hues, delicate patterns to bold shapes.
Why This Icing Stands Out
A well-made royal icing delivers artistry, structure, and ease in every batch. Its smooth finish enhances festive cookies, everyday treats, and special-occasion designs with equal elegance. Ideal for celebrations, seasonal baking projects, and beautifully decorated gifts, it remains a favorite for bakers who want dependable results and striking visual impact.
Questions
Can I make royal icing without meringue powder?
Yes, you can replace it with fresh egg whites. Use the same total liquid volume. Fresh whites create a softer texture, while meringue powder gives more stability and longer shelf life.
Why is my royal icing too runny or too thick?
The icing is runny when it has too much water and thick when it has too much powdered sugar. Add water in ½-teaspoon amounts for thinning or powdered sugar in 1-tablespoon amounts for thickening. The ideal texture flows slowly and smooths out within 10–12 seconds.
How do I prevent air bubbles in royal icing?
Let the icing rest for 10 minutes before using. Resting allows bubbles to rise. Stir gently with a spatula—vigorous mixing introduces air. Using gel color instead of liquid also reduces trapped bubbles.
How long does royal icing take to dry?
Royal icing dries to the touch in 6–12 hours, depending on humidity. A full cure takes up to 24 hours. Drying uncovered at room temperature ensures a crisp, smooth finish.
Can royal icing be frozen or made ahead?
Yes, royal icing stores well. Seal it in an airtight container with plastic wrap touching the surface and refrigerate for four days. Freezing is possible, but the texture may separate slightly—stir thoroughly after thawing.
Is royal icing gluten-free or allergy-friendly?
Royal icing is naturally gluten-free, but it contains egg proteins if made with meringue powder or fresh egg whites. For an egg-free version, use aquafaba as a substitute to maintain structure.
What foods pair best with royal icing for decorating?
Royal icing is perfect for sugar cookies, gingerbread, and shaped holiday cookies. It works beautifully for outlining, flooding, lettering, and small 3D decorations. Its crisp texture enhances edible art and detailed designs.
Recivelle · /recipe/royal-icing-recipe-dries-smooth