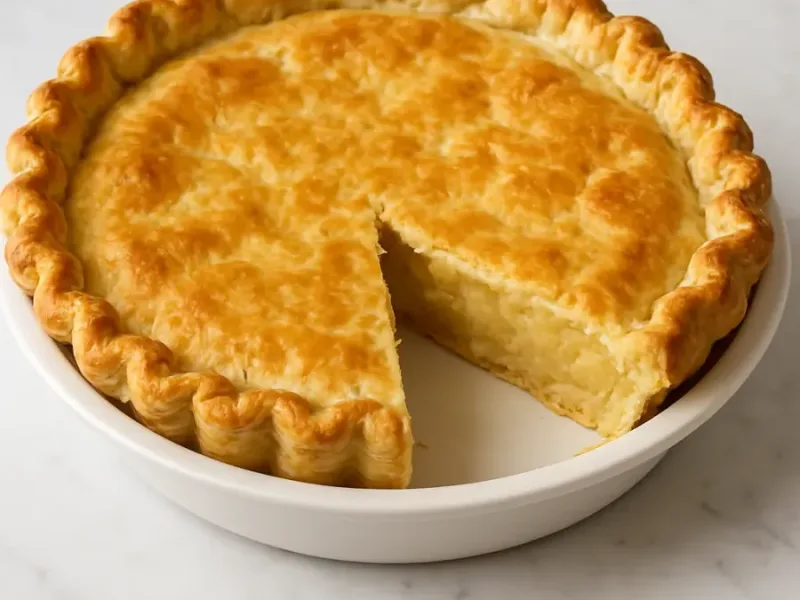
Base recipe: 8
Your kitchen companion
Ingredients
Check off ingredients as you prepare them.
Follow the steps at your own pace.
Method
Mix dry ingredients: In a large mixing bowl, combine 2 ½ cups flour, 1 tsp salt, and 1 tbsp sugar. Whisk until evenly distributed.
Cut in butter: Add 1 cup cold cubed butter. Use a pastry cutter or fingertips to cut butter into the flour until the mixture resembles coarse crumbs with pea-sized pieces of butter visible.
Add water: Sprinkle 6 tbsp ice water evenly over the mixture. Stir gently with a fork until dough just begins to come together. If too dry, add up to 1 more tbsp water (15 ml).
Form dough: Gather dough into a ball, divide into two equal discs, and wrap tightly in plastic wrap.
Chill dough: Refrigerate the wrapped discs for at least 60 minutes until firm. This step prevents shrinkage and ensures flakiness.
Roll out dough: On a lightly floured surface, roll one disc to about ⅛ inch (3 mm) thick and large enough to fit a 9-inch (23 cm) pie pan. Rotate dough while rolling to prevent sticking.
Fit into pan: Carefully transfer rolled dough into the pie pan. Gently press into the bottom and sides without stretching. Trim excess dough, leaving a 1-inch (2,5 cm) overhang.
Shape edges: Fold overhang under itself and crimp edges with fingers or fork for decoration.
Chill before baking: Place the shaped crust in the refrigerator for 20 minutes before baking to maintain structure.
Blind bake (if required): Preheat oven to 375 °F (190 °C). Line crust with parchment paper, fill with pie weights or dried beans, and bake for 20 minutes. Remove weights and parchment, then bake an additional 15–20 minutes until golden brown.
Extra technique, safety notes and details when you want to go deeper.
More tips & details
Perfect Flaky Pie Crust for Sweet and Savory Baking
A timeless pastry foundation for every pie creation
A homemade pie crust recipe sets the stage for every memorable pie, whether filled with rich chocolate custard, fresh seasonal fruits, or hearty savory fillings. The combination of cold fat, flour, and just the right amount of liquid transforms into layers of buttery, flaky pastry that are tender enough to melt in the mouth yet sturdy enough to hold the filling. A well-made crust balances structure with delicacy, providing both a protective base and a golden, crisp finish.
Working with dough requires attention to detail—maintaining the fat cold, avoiding overmixing, and resting the dough properly are the secrets to creating a pie crust that is both light and flavorful. The texture should reveal distinct layers that shatter gently with each bite, delivering a pastry that feels both rustic and refined. When prepared correctly, this dough adapts to both fruit pies and savory quiches, making it an essential skill in every kitchen.
Historical origins of pie crust
The origins of pie crust trace back to ancient civilizations, where dough was used as a vessel to hold fillings rather than being eaten. Egyptians and Romans crafted rudimentary crusts primarily as cooking containers. Over centuries, European bakers refined techniques, incorporating butter and lard to achieve the delicate textures we know today. By the Middle Ages, crusts had become edible works of art, and in the United States, pie became a cornerstone of culinary tradition, with the homemade pie crust at its heart.
The craft of flaky layers and tender texture
Achieving the perfect texture comes down to the balance of three essential components:
- Flour creates the structure while keeping the crumb delicate.
- Fat such as butter or shortening provides richness, tenderness, and the sought-after flaky layers.
- Liquid brings the dough together without overdeveloping the gluten, ensuring a crust that is pliable yet crisp when baked.
Additional touches such as a pinch of sugar for sweet pies or an extra egg wash for shine give versatility to this pastry base. Resting the dough in the refrigerator is not just a step but a necessity—it allows the gluten to relax and the fat to firm up, creating visible flake once baked.
Why you’ll love this recipe
- Flaky and buttery layers every time
- Versatile for both sweet and savory pies
- Beginner-friendly technique with step-by-step guidance
- Customizable flavor with simple ingredient adjustments
- Reliable results for holidays, celebrations, or everyday baking
Storage and make-ahead
A homemade pie crust holds its quality remarkably well when stored correctly:
- Room temperature: up to 2 days once baked, covered to prevent drying.
- Refrigerator: unbaked dough discs can rest for up to 3 days.
- Freezing: unbaked crust or dough can be frozen for 2 months, wrapped tightly.
- Reheating: baked crust regains crispness when warmed at 150 °C (300 °F) for 8–10 minutes.
Pastry foundations and culinary context
Pie crust is more than a base—it defines the overall experience of the pie. The difference between a lackluster crust and a golden, flaky masterpiece is technique. Proper handling ensures layers that puff slightly, edges that stay firm, and a flavor that complements rather than overpowers the filling. Bakers often say that the crust is what separates a good pie from a great one, and this homemade pie crust recipe embodies that philosophy.
With practice, every baker discovers personal preferences—some lean toward all-butter crusts for maximum flavor, while others prefer a blend of fats for easier handling. What remains consistent is the universal appeal of a perfectly executed pie crust: its aroma while baking, its satisfying texture when cut, and its ability to showcase fillings at their very best.
Flavor and texture of homemade pie crust recipe
A homemade pie crust recipe delivers the ultimate combination of crispness and tenderness. Layers of butter and flour create a pastry that is light yet strong enough to hold sweet fruit fillings or savory quiches. The subtle salt enhances flavor, while the golden finish adds visual appeal. Every bite offers the flaky texture that defines classic baking.
Ease and consistency in preparation
This crust is easy to prepare with just a few ingredients and a clear step-by-step method. The 20 minutes prep time, short resting period, and manageable rolling process ensure reliable results. Whether used for a simple apple pie or a rich chocolate tart, the dough handles well and maintains consistency across different recipes.
Dietary flexibility and substitutions
The homemade pie crust recipe adapts easily to different dietary needs. For a gluten-free version, use a certified flour blend with xanthan gum. For dairy-free or vegan baking, replace butter with coconut oil or vegan margarine. These substitutions keep the crust flaky while opening the recipe to a wider audience.
Best occasions to enjoy homemade pie crust recipe
This crust serves as a foundation for everyday desserts, festive meals, and seasonal specialties. It is the ideal base for holiday pies, comforting winter dishes, and fresh summer fruit tarts. The balance of flavor, versatility, and reliable performance makes it an essential recipe to master.
A homemade pie crust recipe stands out because it combines flavor, ease, and adaptability in one pastry. Perfect for gatherings, celebrations, or quiet family dinners, this crust transforms every pie into something memorable and special.
Questions
What type of flour is best for homemade pie crust?
All-purpose flour is the best choice for pie crust. It gives a balance of tenderness and structure, making it easy to roll while still strong enough to hold fillings. Using bread flour can make the crust tough, while cake flour may cause it to crumble.
Can I substitute butter in this recipe?
Yes, butter can be replaced with shortening, lard, or dairy-free margarine. Butter gives the best flavor and flaky texture, while shortening provides easier handling. Coconut oil can be used for a vegan pie crust, but it changes the flavor and texture.
Why is my pie dough cracking when I roll it out?
Pie dough cracks when it is too dry or too cold. Add a teaspoon of cold water and knead gently to bring it together. If the dough is firm from chilling, let it rest at room temperature for 5–10 minutes before rolling.
How do I store homemade pie crust?
Homemade pie crust can be stored in the refrigerator for 3 days or frozen for up to 2 months. Wrap dough tightly in plastic wrap or keep in an airtight container to prevent drying. Thaw frozen dough overnight in the fridge before rolling.
Can pie crust be made gluten-free?
Yes, use a certified gluten-free flour blend with added xanthan gum for structure. Gluten-free dough is more delicate, so chilling is especially important. Handle it gently and roll between sheets of parchment paper.
What’s the best way to decorate pie crust edges?
The easiest method is crimping with your fingers, but you can also press with a fork for a classic look. Braided edges or cut-out shapes from leftover dough add a decorative finish to fruit pies and festive bakes.
Is it possible to make vegan pie crust?
Yes, replace butter with solid coconut oil or vegan margarine. Coconut oil makes the crust crisp but adds a light coconut flavor. Vegan margarine works best for a more neutral, buttery taste.
Recivelle · /recipe/homemade-pie-crust-recipe-step-step