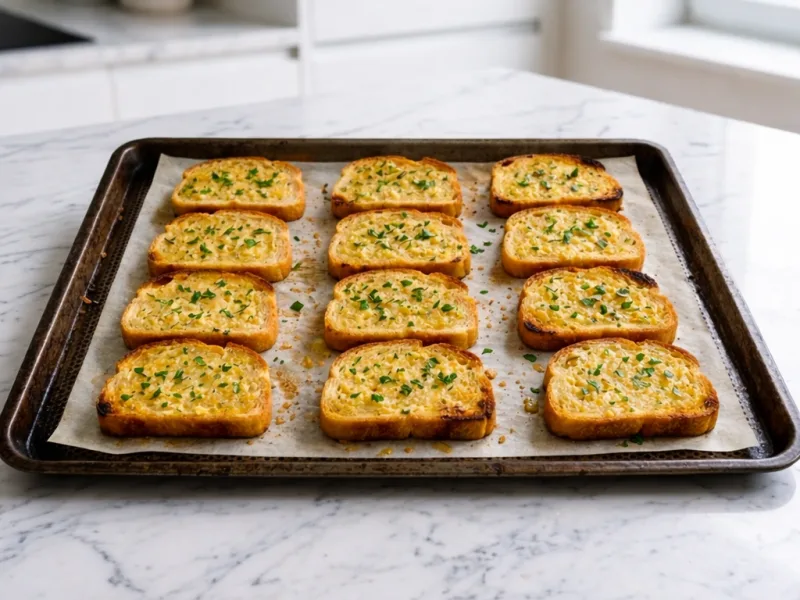
Base recipe: 12 slices
Your kitchen companion
Ingredients
Check off ingredients as you prepare them.
Follow the steps at your own pace.
Method
Preheat the oven: Set a conventional oven to 392°F (200°C). Position the rack in the middle. Line a baking tray about 18 × 13 inches (45 × 33 cm) with parchment paper so the slices brown evenly without sticking.
Slice the bread: Cut 1 loaf homemade bread (28 oz / 800 g) into 12 slices about ¾ inch (1.5–2 cm) thick using a serrated bread knife and cutting board. This thickness keeps the interior soft while allowing the edges to become crisp during baking.
Melt the butter: Place 7 tbsp unsalted butter (100 g) in a small saucepan over low heat or in a microwave-safe bowl. Warm gently until the butter melts completely but does not boil.
Prepare the garlic butter: Combine the melted 7 tbsp unsalted butter (100 g) with 0.7 oz finely minced fresh garlic (20 g), 1 tbsp chopped parsley (5 g), and ½ tsp fine salt (3 g) in a small mixing bowl. Stir until the garlic and herbs are evenly distributed.
Arrange the slices: Place the 12 bread slices on the prepared baking tray in a single layer, leaving a small space between each slice so hot air can circulate and crisp the edges.
Spread the garlic butter: Use a pastry brush or spoon to coat the top of each slice evenly with the garlic butter mixture. The surface should appear glossy but not dripping.
Bake the bread: Place the tray on the middle rack and bake at 392°F (200°C) for 10–12 minutes. The slices are ready when the edges turn light golden and the surface looks lightly toasted.
Optional finishing browning: For extra crispness, switch the oven to broil or top heat at 425°F (220°C) for 1–2 minutes. Watch closely so the garlic browns lightly without burning.
Rest briefly before serving: Remove the tray from the oven and allow the slices to rest for 3 minutes. This short rest lets the butter settle into the crumb and keeps the surface from becoming oily.
Extra technique, safety notes and details when you want to go deeper.
More tips & details
Elevating Your Loaf with a Golden Garlic Infusion
Why this oven-baked garlic bread variation works
This recipe is designed to transform a finished loaf, like our signature Homemade Bread, into a rich and savory accompaniment in just a few minutes. Instead of starting from scratch with dough, this method uses a fully cooled loaf to create a quick side dish that doesn't sacrifice quality. This variation exists to solve a specific kitchen need: providing the golden crunch and aromatic depth of gourmet garlic bread without the long wait of fermentation or proofing.
When these slices enter a 392 °F (200 °C) oven, the butter melts and penetrates the crumb through capillary action, while the outer layer dehydrates just enough to crisp up. This brief exposure to high heat creates a beautiful texture contrast—a toasted, crunchy exterior with a moist, tender interior. It is the perfect solution for busy cooks who want to elevate a simple loaf into a flavorful addition to any meal.
Texture and flavor balance in a quick garlic bread recipe
The success of this version lies in the balance between controlled browning and a deep infusion of aromatics. Garlic contains sulfur compounds that are activated when heated in fat, producing that classic savory aroma within the first few minutes of baking. The butter acts as a carrier, distributing the garlic flavor evenly across the surface while protecting the interior from drying out.
Several physical changes occur during this short finishing stage:
- Surface caramelization — the edges turn a light golden color as the bread reacts to the heat.
- Moist crumb retention — the butter absorbs into the pores, ensuring the center stays succulent.
- Aromatic release — the heat activates the garlic oils, filling the room with a toasted, nutty scent.
These effects develop rapidly, usually within a 10- to 12-minute window. When the edges reach a perfect crispness while the center remains soft, the bread has reached its ideal serving point.
Serving context and finishing characteristics
This preparation is a "finishing" dish rather than a primary bake. Because the base is already cooked, the oven's job is purely to develop flavor and refine the surface texture. This fits perfectly into a standard kitchen workflow; you can slice and butter the bread while your main course is resting, then pop it in the oven just before you are ready to eat.
The result is a bread with a fragrant surface and a satisfying crunch, making it an excellent partner for pasta dishes, roasted meats, or hearty stews. For the best experience, always serve the slices while they are still warm to ensure the crust stays at its peak texture.
What makes this version reliable in home kitchens
The beauty of this method is its predictability. Unlike working with raw dough, which can be sensitive to humidity or yeast activity, this recipe relies on consistent oven heat and proper fat distribution. A stable, well-baked loaf provides the perfect structural foundation to absorb the garlic butter without becoming soggy or collapsing.
Because the preparation is so straightforward, it is an excellent choice for beginners. As long as the slices are cut to a uniform thickness, they will brown evenly. The visual cues are simple to follow: once you see the edges turn golden and the butter creates a glistening surface, your garlic bread is ready to enjoy.
Chef PEKIS recommendations
For the best results, always use bread that has completely cooled to room temperature. Warm bread releases internal steam, which can prevent the surface from becoming truly crisp. I recommend a slice thickness of about 0.6–0.8 inch (1.5–2 cm) to keep the interior moist while the edges toast.
Be careful not to place your baking sheet too close to the top heating element. Excessive top heat can burn the minced garlic before the bread surface has finished browning, resulting in a bitter taste. Interestingly, using a loaf that is one day old often produces a superior result; the slightly drier crumb is even better at absorbing the garlic infusion, leading to a more balanced flavor.
Storage and make-ahead guidance
Freshly baked garlic bread is at its prime the moment it leaves the oven. If you have leftovers, they can be stored in an airtight container at room temperature for up to 24 hours. To restore that original oven-fresh crunch, simply reheat the slices in a 356 °F (180 °C) oven for about 4 to 5 minutes.
You can also prepare this dish ahead of time by spreading the butter mixture onto the slices and keeping the tray in the refrigerator for a few hours. When you're ready to serve, just move the tray directly into a preheated oven for a quick and effortless finish that tastes just as good as a fresh batch.
Best Served at the Table
Homemade garlic bread, a baked version made from sliced loaf rather than dough preparation, arrives at the table with a surface that shows a golden crust and scattered green herbs. The bread breaks with a soft interior that releases a warm garlic aroma as the slices separate. When served immediately after baking, the crumb remains tender while the edges stay lightly crisp. A slice held in the hand should bend slightly in the center while the corners keep their shape.
The first bite often shows the balance between the toasted surface and the moist crumb beneath it. Butter settles into the open pockets of the bread, carrying garlic and parsley through each bite. The contrast is clear: the outer layer offers gentle resistance while the interior stays soft and fragrant. On the plate, the slices look simple and direct—cut pieces of bread with a lightly glistening surface and small flecks of herbs.
Alongside Everyday Meals
This bread often appears beside dishes that benefit from a mild, savory companion. A plate of tomato-based pasta, a bowl of vegetable soup, or a simple roasted chicken all pair naturally with slices placed on the side of the table. The bread absorbs a little sauce when dipped, while still maintaining its toasted edges. In many kitchens it serves as a shared item rather than a separate course.
The texture stays reliable during the first minutes after serving. The edges keep their crisp bite, while the center remains soft enough to tear easily by hand. As the slices rest on the serving plate, the butter continues to settle into the crumb, deepening the garlic scent that rises from the surface. The result is straightforward and familiar: warm bread with a lightly toasted exterior and a tender interior meant to be eaten while it still carries that fresh baked warmth.
Questions
Why is my homemade garlic bread not crispy in the oven?
Homemade garlic bread turns soft instead of crispy when the oven temperature is too low or the slices are too thick. Crisp texture forms only when high oven heat quickly evaporates surface moisture while the butter browns the bread. If the oven runs below 392°F (200°C), the bread absorbs butter before browning begins. Correct garlic bread develops golden edges and a lightly toasted surface while the interior stays soft. If the slices look pale and feel greasy instead of firm at the edges, the oven heat was insufficient. Chef’s tip: Use slices about ¾ inch (1.5–2 cm) thick so the crumb stays soft but the surface can crisp.
How do I keep garlic from burning on homemade garlic bread?
Garlic burns when it is exposed directly to intense top heat before butter melts and coats it. Finely minced garlic cooks quickly and becomes bitter if placed too close to the oven’s top heating element. Baking the slices on the middle rack at 392°F (200°C) allows the butter to melt first and protect the garlic during browning. Proper garlic bread releases a warm roasted garlic aroma and the garlic pieces stay pale golden rather than dark brown. Chef’s tip: Always mix garlic thoroughly into melted butter before spreading it on the bread.
Can I make homemade garlic bread with store-bought bread?
Yes, garlic bread works well with store-bought bread as long as the loaf has a soft crumb and stable crust. Bread that is extremely airy allows butter to leak through, while very dense bread prevents proper absorption. Slices about ¾ inch (1.5–2 cm) thick provide the best structure during baking. The correct result shows crisp edges, melted butter on the surface, and a tender interior crumb without collapsing. Chef’s tip: Slightly day-old bread absorbs garlic butter more evenly than very fresh bread.
Why does homemade garlic bread sometimes taste bland?
Bland garlic bread usually means the garlic butter mixture is uneven or lacks enough salt. Garlic flavor spreads through hot fat, so poorly mixed butter leaves some slices under-seasoned. Salt enhances both butter richness and garlic aroma. When properly balanced, the bread releases a strong garlic fragrance immediately after baking and the surface shows visible garlic and parsley across every slice. Chef’s tip: Stir the garlic butter mixture until the garlic and herbs are evenly distributed before brushing.
How do I know when homemade garlic bread is done baking?
Homemade garlic bread is done when the edges turn light golden brown and crisp while the center remains soft. This usually occurs after 10–12 minutes at 392°F (200°C). The butter should appear fully melted and slightly absorbed into the crumb. When lifted with a spatula, the slice edges feel firm but the center bends slightly. If the surface looks pale and oily, the bread needs a few more minutes of heat. Chef’s tip: Rotate the baking tray halfway through baking to ensure even browning across all slices.
Recivelle · /recipe/homemade-garlic-bread-recipe