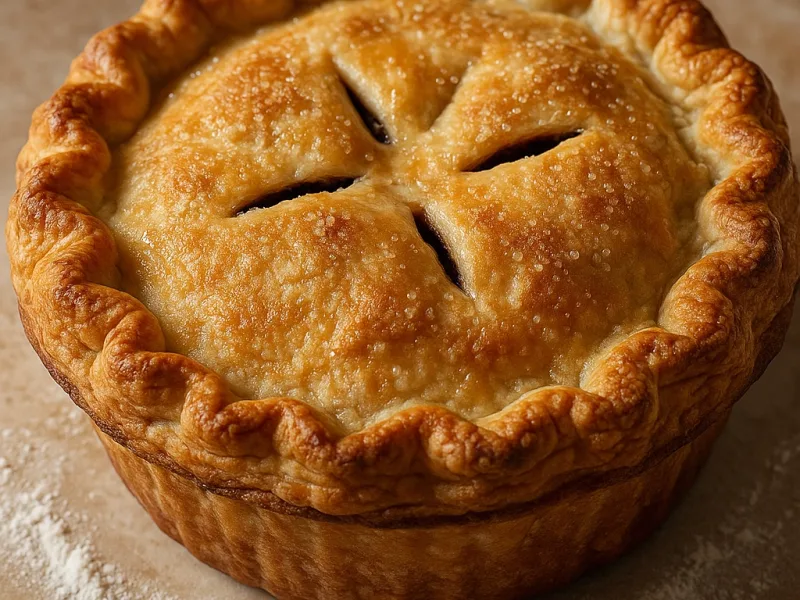
Expert Guide for Creating the Perfect Base for Holiday Desserts
A perfect pie crust transforms any dessert into a celebration. From buttery apple pies to silky pumpkin fillings, the foundation lies in mastering a crust that is tender, flaky, and flavorful. Understanding the balance between fat, flour, and temperature is what separates an average crust from a professional-quality one.
The Heritage of Pie Crusts
The art of pie-making traces back to ancient Egypt, where early bakers used grain paste to encase meats and fruits. Later, during the Middle Ages, pies became a staple across Europe, evolving into the shortcrust pastry we recognize today. Over centuries, each culture contributed unique techniques—French chefs perfected pâte brisée, the British refined double crust pies, and Americans popularized buttery, melt-in-your-mouth crusts as the hallmark of holiday baking traditions.
Understanding Key Ingredients for Perfect Texture
Each ingredient in a pie crust plays a critical role in achieving that ideal balance of crispness and tenderness:
- Flour – Provides structure. Choose all-purpose flour for balance or pastry flour for a softer, more delicate crumb.
- Fat – The secret to flakiness. Use cold butter for flavor or shortening for stability; many bakers mix both to get the best of each.
- Water – Must be ice-cold to keep the fat solid until baking, creating steam that forms flaky layers.
- Salt and Sugar – Enhance flavor. Salt sharpens the butter’s taste, while sugar adds a golden finish.
A crucial rule: temperature control. Always chill ingredients, tools, and even your hands if needed. The colder the dough stays, the flakier the crust will be.
Techniques That Guarantee Success
Perfecting the crust involves more than just mixing ingredients—it’s about handling the dough correctly:
- Cut, don’t blend the fat – Use a pastry cutter or your fingertips to form pea-sized bits of fat in the flour.
- Add water gradually – Start with a few tablespoons and add only until the dough holds together.
- Rest and chill the dough – Wrap and refrigerate for at least 30 minutes to relax gluten and prevent shrinkage.
- Roll with confidence – Lightly flour the surface, and roll from the center outward, turning the dough often to avoid sticking.
- Avoid overworking – Too much handling warms the butter and toughens the crust.
Baking Tips for Golden Perfection
Getting that evenly browned, crisp crust depends on smart baking strategies:
- Preheat the oven fully before baking.
- Use pie weights or dried beans during blind baking to prevent puffing.
- For fruit pies, brush the top crust with egg wash for shine and sprinkle with sugar for texture.
- Bake on the lowest oven rack to ensure the bottom crust cooks thoroughly.
Practical Ideas and Simple Tricks for Creative Variations
Once you’ve mastered the basic crust, explore endless variations that bring personality to your pies:
- Add a teaspoon of vinegar or lemon juice to the dough for extra tenderness.
- Substitute part of the flour with almond or whole wheat flour for nutty depth.
- Infuse the fat with herbs or citrus zest before mixing for subtle aroma.
- Use brown butter for rich caramel notes in sweet pies.
- Brush the baked crust with melted chocolate before filling to prevent sogginess in cream pies.
Useful Combinations and Flavor Inspiration
Blend traditional craftsmanship with modern creativity:
- Classic Pairings: Buttery crust with apple, cherry, or pumpkin filling.
- Modern Twists: Incorporate sea salt flakes, lavender sugar, or roasted hazelnuts for a gourmet touch.
- Savory Inspiration: Try the same dough base for quiches or meat pies, reducing sugar and enhancing with herbs or cheese.
Inspiration from Traditional and Modern Cuisine
In French patisseries, pie crusts are elevated to art—thin, crisp, and often glazed for shine. In the United States, the emphasis lies in the homemade, rustic style, where small imperfections signal authenticity and warmth. Modern chefs, inspired by both traditions, now experiment with gluten-free flours, plant-based fats, and decorative lattice techniques that merge beauty and flavor.
Common Mistakes and How to Avoid Them
- Dough cracks: Too dry—add a touch more cold water.
- Tough texture: Overmixed dough or warm fat.
- Shrinking crust: Insufficient resting time or stretching the dough into the pan.
- Soggy bottom: Underbaked crust or wet filling; use a hot baking sheet underneath for a crisp base.
Why This Method Works
The combination of cold ingredients, minimal handling, and resting periods ensures that fat remains solid until baking. As the pie enters the oven, these fat pockets release steam, creating flaky layers that make every bite light and delicate. This method works consistently because it respects the chemistry of baking—temperature, hydration, and balance.
Chef’s Tip
For picture-perfect holiday pies, brush the crust edges with heavy cream instead of egg wash. It creates a soft golden sheen without the glossy finish, perfect for elegant holiday presentation. Always let the pie cool for at least 2 hours before slicing; the filling will set, and the crust will stay crisp.
Bringing Tradition to the Modern Table
A beautifully crafted pie crust isn’t just a foundation—it’s a symbol of holiday warmth, family, and craftsmanship. Whether you follow classic recipes or experiment with modern flavor infusions, the essence remains the same: patience, precision, and passion. Perfecting your crust means creating a dessert that tells a story—layered with flavor, history, and the joy of sharing something truly handmade.