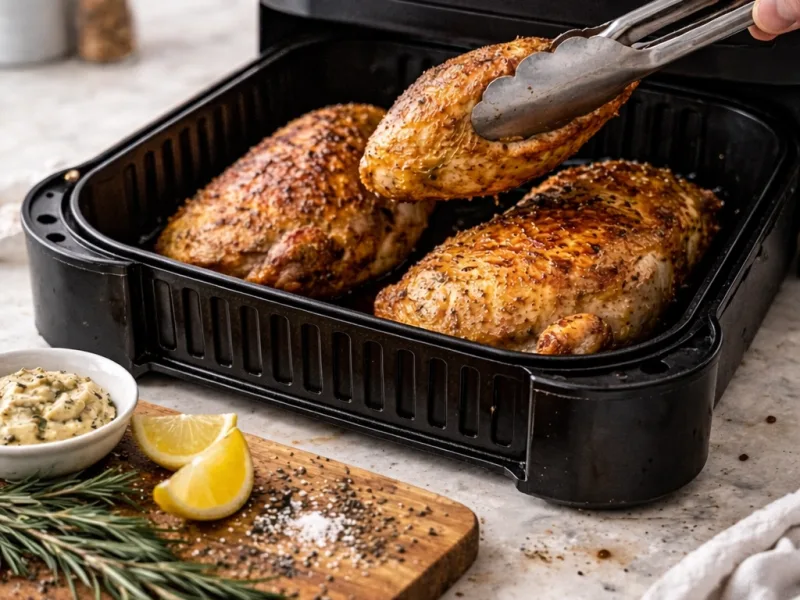
Technical Strategies for Professional Convection Results
To achieve restaurant-quality results when preparing protein in a modern convection appliance, one must look beyond simple timers and dials. Success is found in the intersection of thermodynamics and culinary precision. Unlike traditional ovens, which rely on slower natural convection, an air fryer utilizes a high-velocity fan to circulate heated air around the food. This process, known as forced convection, significantly accelerates the rate of heat transfer to the surface of the meat. By understanding the mechanical behavior of heat within a high-velocity cooking chamber, you can produce more consistent browning, better moisture retention, and more reliable doneness across various types of protein.
This guide serves as a comprehensive resource for navigating the technical variables that define a perfect meal—from the initial dry-brining stage to the critical final resting period. Professional kitchens rely on temperature-based cooking rather than time estimates to ensure repeatable results across different cuts and equipment. By mastering these principles, you ensure that every roast or steak remains succulent and safe. This approach eliminates common problems such as dryness, uneven doneness, and poor surface texture by focusing on measurable cooking variables that are often overlooked by casual home cooks who rely solely on factory presets.
The Standardized Core Method for Professional Air Frying
While every cut of meat has its own unique requirements, a professional-grade workflow provides a repeatable framework for success. This method prioritizes safety and texture by focusing on internal variables rather than external guesses. First, preheat the air fryer to the target temperature for at least 3 to 5 minutes. This ensures the chamber reaches thermal equilibrium before the protein is introduced. Next, ensure the surface of the meat is as dry as possible; any moisture on the skin or flesh will act as a heat sink, delaying the browning process and potentially steaming the meat from the outside in. This is a critical factor when preparing an Air fryer turkey breast.
Once dry, apply a very thin layer of high-smoke-point oil and your desired seasonings. Arrange the meat in a single layer, ensuring there is sufficient space between pieces for the air to circulate. Monitor the progress using a digital instant-read thermometer, focusing on the thickest part of the muscle. You must implement a "pull strategy," removing the meat slightly before the final target to account for the energy already stored in the exterior layers. Finally, the meat must be allowed to rest, permitting the internal pressure to stabilize and the juices to redistribute throughout the fibers.
Technical Specifications for Common Meat Cuts
Since structured data is essential for both user clarity and search engine extraction, the following specifications outline the precise thermal requirements for the most popular proteins. These benchmarks account for carryover cooking and the specific resting durations needed to achieve optimal texture and safety without the use of a traditional table format.
Beef Steak (Medium-Rare)
- Target Internal Temp (Finish): 135°F (57°C)
- Pull Temp (Remove from Air Fryer): 131°F (55°C)
- Resting Time: 10 Minutes
- Primary Goal: Achieving a warm, even pink center with minimal gray banding.
Beef Steak (Medium)
- Target Internal Temp (Finish): 145°F (63°C)
- Pull Temp (Remove from Air Fryer): 140°F (60°C)
- Resting Time: 10 Minutes
- Primary Goal: Developing a firm, juicy texture with a slightly pink core.
Chicken Breast
- Target Internal Temp (Finish): 165°F (74°C)
- Pull Temp (Remove from Air Fryer): 162°F (72°C)
- Resting Time: 5–10 Minutes
- Primary Goal: Maintaining maximum juiciness in lean muscle fibers.
Chicken Wings
- Target Internal Temp (Finish): 185°F (85°C)
- Pull Temp (Remove from Air Fryer): 180°F (82°C)
- Resting Time: 5 Minutes
- Primary Goal: Complete collagen breakdown for fall-off-the-bone tenderness.
Whole Roast Chicken
- Target Internal Temp (Finish): 165°F (74°C)
- Pull Temp (Remove from Air Fryer): 158°F (70°C)
- Resting Time: 20 Minutes
- Primary Goal: Maximum skin crispness and internal thermal equilibrium.
Pork Roast
- Target Internal Temp (Finish): 145°F (63°C)
- Pull Temp (Remove from Air Fryer): 140°F (60°C)
- Resting Time: 15–20 Minutes
- Primary Goal: Ensuring a food-safe yet tender and blushing interior.
Pork Belly and Ribs
- Target Internal Temp (Finish): 195°F (90°C)
- Pull Temp (Remove from Air Fryer): 190°F (88°C)
- Resting Time: 15 Minutes
- Primary Goal: Intensive fat rendering and connective tissue softening.
Ground Meatballs
- Target Internal Temp (Finish): 160°F (71°C)
- Pull Temp (Remove from Air Fryer): 158°F (70°C)
- Resting Time: 5 Minutes
- Primary Goal: Total pathogen neutralization while preventing dry crumbly texture.
Duck and Picanha
- Target Internal Temp (Finish): 135°F (57°C)
- Pull Temp (Remove from Air Fryer): 132°F (55°C)
- Resting Time: 15 Minutes
- Primary Goal: Deep rendering of the thick fat cap to baste the meat.
The Physics of Heat Transfer and Boundary Layers
In an air fryer, the primary mechanism of cooking is the movement of air. This high-speed environment mimics the effects of deep frying by removing the "boundary layer" of cool air and moisture that typically surrounds food in a static oven. This allows the heat to hit the surface with much higher intensity. However, this efficiency comes with a trade-off. Because the air is moving so quickly, it also increases the rate of evaporation. If the temperature is too high for too long, the exterior of the meat will dehydrate and become leathery before the interior is fully cooked.
Managing this balance is essential for maintaining quality. By controlling the exposure time and using fat as a thermal conductor, you can protect the protein while still achieving a crisp, golden-brown finish. The heat transfer is a dual-threat system of radiation and convection. The heating element emits radiant heat that hits the top of the meat, while the fan pulls this heat down and pushes it up through the perforated bottom of the basket. This creates a temperature gradient where the exterior of the meat heats much faster than the core, a phenomenon that is particularly noticeable when preparing an Air fryer roast chicken.
Understanding the Maillard Reaction in High-Velocity Air
The Maillard reaction is the chemical transformation responsible for the complex, savory flavors we associate with roasted or fried meat. In an air fryer, this reaction happens at an accelerated pace. Typically, the reaction begins to excel at temperatures between 285°F and 330°F (140°C and 165°C). Since the air fryer removes surface moisture almost instantly, the surface temperature of the meat rises into this browning range much faster than in a conventional oven. This efficiency is why air-fried foods often have a superior crust compared to baked alternatives.
To maximize this effect, always ensure the surface is as dry as possible before cooking. Surface moisture acts as a heat sink; the energy will be wasted evaporating water rather than browning the meat. This allows the heat to be distributed evenly across the surface rather than concentrating on the highest points of the meat's texture. For cuts with significant surface area, such as a large Air fryer pork roast, the Maillard reaction is what transforms the exterior fat into a deeply flavorful, crispy layer that protects the meat during the final stages of cooking.
Precision Temperature Reference and Safety Standards
In the world of professional cooking, "time" is a secondary variable. The only metric that truly determines doneness and safety is the internal temperature. Relying on a recipe that says "cook for 15 minutes" is risky because a 1-inch (2.5 cm) steak cooks differently than a 1.5-inch (3.8 cm) steak, even if they weigh the same. Each type of meat has a defined temperature range where structure and moisture balance are optimal. For example, poultry is generally considered safe at a final temperature of 165°F (74°C).
However, different cuts within the same animal require different treatments. Darker poultry cuts benefit from being cooked to a higher temperature of 175°F to 185°F (79°C to 85°C) to allow the connective tissues to fully break down into gelatin. This is a critical factor when making Air fryer chicken wings. Conversely, ground products must always reach 160°F (71°C) to ensure all surface bacteria introduced during the grinding process have been neutralized. Understanding these distinctions is the foundation of culinary safety.
The Essential Mechanics of Carryover Cooking
Internal temperature continues to rise after the meat is removed from the air fryer. This process, known as carryover cooking, is a result of the thermal energy stored in the outer layers of the meat moving toward the cooler center. This must be considered to avoid overcooking. The intensity of this rise depends on the size and density of the meat. A thin cut might only rise 2°F (1°C), but a large roast can increase by as much as 10°F (6°C). By pulling the meat early, you allow this residual heat to finish the job gently, resulting in a more uniform level of doneness.
To master this strategy, you should remove small or thin cuts 2°F (1°C) before the target. Medium-sized cuts should be removed 5°F (3°C) before the final goal. For large roasts, you may need to pull the bird when it hits 155°F to 158°F (68°C to 70°C) to reach the final safety threshold during the resting phase. This precision is what separates a dry, stringy meal from a professional-grade culinary experience. It is a vital technique for maintaining the moisture in Air fryer beef meatballs, where the small size leads to rapid temperature changes.
Resting Science and Moisture Redistribution
Resting meat is not merely a passive pause; it is a critical phase of moisture management. During the cooking process, the intense heat causes the muscle fibers to contract and tighten, effectively "squeezing" the internal moisture toward the center of the cut. If you slice into the meat immediately, that built-up pressure will force the juices out onto the cutting board, leaving the meat dry and fibrous. As the meat rests and the temperature equalizes, the muscle fibers begin to relax and reabsorb the moisture.
This results in a significantly more tender and flavorful bite. The duration of the rest depends on the size of the protein. Large roasts may need up to 20 or 30 minutes. During this time, the meat should be loosely covered to retain heat while maintaining surface texture. Never wrap meat tightly in foil, as this creates a steam tent that will soften the crispy crust you worked so hard to achieve. This step is non-negotiable for an Air fryer chicken breast, which can turn from juicy to dry in a matter of seconds if sliced prematurely.
Lean Proteins and the Risk of Dehydration
Lean cuts like chicken breast or turkey tenderloin have very little internal fat to protect them from the drying effects of high-velocity convection. To keep them juicy, avoid excessively high temperatures that would evaporate too much internal moisture before the core is cooked. Cooking at 350°F to 365°F (177°C to 185°C) provides enough heat for browning without the aggressive dehydration associated with the 400°F (204°C) setting. This controlled environment is key to a successful Air fryer fried chicken.
Protective coatings are also highly effective for lean meats. Whether it is a simple dry rub or a starch-based coating, these layers act as a thermal buffer. They shield the delicate muscle fibers from direct air contact while providing a satisfying crunch. The oil used in these coatings also helps to conduct heat more evenly across the surface, ensuring there are no cold spots where the browning is incomplete. This protective barrier allows the interior to remain tender while the exterior reaches a high enough temperature for structural crisping.
Advanced Preparation and Dry Brining Techniques
For a truly professional result, the preparation starts hours or even days before the meat enters the air fryer. Dry brining—the process of salting the meat and letting it rest uncovered in the refrigerator—is the most effective way to improve both flavor and texture. Salt works through osmosis to penetrate deep into the muscle fibers, where it denatures the proteins, allowing them to hold onto more moisture during the cooking process. This molecular change is why dry-brined meat remains succulent even after exposure to intense convection heat.
Furthermore, the salt draws moisture to the surface, where it dissolves into a brine and is eventually reabsorbed. This process also leaves the surface of the meat exceptionally dry, which is the perfect starting point for the air fryer's convection cycle. This technique is especially powerful for larger cuts. By air-drying the skin in the refrigerator, you ensure that the fan-driven heat can immediately begin the browning process without having to fight through a layer of surface water. This results in a superior level of skin crispness that cannot be achieved with "wet" preparation methods.
The Physics of Muscle Fiber Contraction
Understanding what happens inside the meat during a cook is essential for troubleshooting. Meat is primarily composed of water, protein (actin and myosin), and fat. As the internal temperature rises above 105°F (41°C), the protein strands begin to denature and coil. Between 140°F and 155°F (60°C to 68°C), the connective tissue (collagen) begins to shrink, which is why meat feels firmer as it cooks. If the temperature continues to rise too quickly, the fibers shrink so much that they expel all their internal moisture.
The air fryer's rapid heat transfer can cause this contraction to happen faster than in a traditional oven. This is why "staging" your cook is often beneficial. Starting a thick cut at a lower temperature allows the muscle fibers to tighten gradually, while a final blast of high heat at the end provides the necessary browning. This method preserves the structural integrity of the meat while ensuring the exterior meets the aesthetic and flavor standards of professional roasting.
Seasoning Adhesion and Oil Selection Dynamics
In a high-airflow environment, dry rubs and light spices can be blown off the meat and into the heating element, causing smoke and a loss of flavor. To prevent this, always utilize a seasoning adhesion technique. Lightly coating the meat in oil before applying spices creates a "glue" that keeps your flavors intact. For the best results, use oils with high smoke points such as avocado, grapeseeed, or refined olive oil. Avoid butter or extra virgin olive oil for high-heat cycles, as they can burn and produce bitter off-flavors.
The oil does more than just hold the spices; it also acts as a medium for heat transfer. Air is a relatively poor conductor of heat compared to fat. By providing a thin layer of oil, you are essentially "frying" the surface of the meat at a microscopic level as the hot air passes over it. This leads to a more uniform color and a crispier texture. For lean meats, this oil is vital for preventing the surface from becoming tough and "wood-like" during the rapid dehydration of the convection process. It also helps to encapsulate the spices, allowing their fat-soluble flavor compounds to bloom more effectively.
Impact of Meat Thickness and Starting Temperature
A factor that is frequently ignored in home recipes is the starting temperature of the meat. Taking a cold steak directly from the refrigerator and placing it in a 400°F (204°C) air fryer creates a massive thermal gradient. The exterior will likely overcook before the center even begins to warm. Professional results often require "tempering" the meat—allowing it to sit at room temperature for 20 to 40 minutes before cooking. This reduces the temperature gap and ensures a more even level of doneness from the edge to the core.
Thickness also dictates the "convective strategy." A thin piece of meat has a high surface-area-to-volume ratio, meaning it will brown and cook through almost simultaneously. A thick roast, however, has a much smaller surface area relative to its mass. If you treat a thick roast like a thin cut, you will end up with a burnt exterior and a raw center. For items thicker than 1.5 inches (4 cm), the "low and slow" approach in the air fryer is almost always superior, followed by a quick sear at the end to finish the Maillard reaction.
Airflow Management and Basket Loading Strategy
The "fryer" part of the name comes from the air's ability to act like oil. If you overlap pieces of meat, the air cannot reach the contact points, resulting in pale, soggy spots. Always arrange meat in a single layer. If you are cooking a large batch, it is better to cook in multiple rounds than to crowd the basket. If the air cannot "wrap" around each piece, the cooking will be uneven, with some parts becoming overdone while others remain undercooked. This is the primary reason why many home air-fried meals lack the consistent crunch found in professional kitchens.
If your air fryer has a rack system rather than a basket, ensure that the meat on the top rack isn't so close to the heating element that it burns before the bottom rack is done. Rotating the racks or flipping the meat halfway through the cooking cycle is a professional adjustment that ensures uniform results. This simple step compensates for the radiant heat bias of the top-mounted heating element, ensuring the bottom of the meat receives the same intensity of heat as the top. Proper load management is the difference between an average meal and one that is perfectly optimized.
Managing Smoke and Fat Rendering Mechanics
When cooking high-fat proteins, the rendered grease can drop into the bottom pan and begin to smoke if it hits its smoke point. To manage this, ensure your appliance is clean before every use. Old fat in the bottom of the tray will smoke much faster than fresh drippings. While some suggest placing water or a slice of bread in the bottom of the drawer to catch grease, you should always consult your specific manufacturer’s manual first to ensure you aren't interfering with the unit's safety vents or airflow sensors.
For fatty cuts, the rendering process is actually part of the flavor development. As the fat melts, it bastes the meat, adding richness and helping to conduct heat. The goal is to melt that fat slowly enough that it doesn't just run off, but quickly enough that it crisps the exterior. This balance is achieved by selecting a temperature that is high enough to trigger the rendering but not so high that it scorches the fat before it can melt. For items like pork belly, this rendering is what creates the meltingly tender texture that makes the cut so desirable.
Environmental Factors and Altitude Adjustments
Cooking meat in an air fryer at higher altitudes requires specific adjustments. As altitude increases, air pressure decreases, which lowers the boiling point of water. This means that moisture inside the meat will evaporate at a lower temperature, increasing the risk of drying out the protein. Additionally, thinner air is a less efficient conductor of heat. If you are cooking at an elevation above 3,000 feet (915 meters), you may find that you need to slightly increase the cooking time or decrease the temperature to prevent the exterior from dehydrating too quickly.
Relative humidity also plays a role. In very dry climates, the air fryer's convection fan acts like a desert wind, pulling moisture out of the meat with extreme efficiency. In these conditions, using a light marinade or a more generous coating of oil can help provide a sacrificial layer of moisture that protects the meat's internal juices. Understanding your local environment allows you to fine-tune the standard rules of convection to fit your specific kitchen conditions.
Reheating Meat for Quality Preservation
The air fryer is arguably the world's best tool for reheating meat without ruining its texture. Microwaves vibrate water molecules, which often results in rubbery, unevenly heated protein. An air fryer, however, uses the same convection principles to gently re-crisp the surface while warming the center. To reheat meat properly, use a lower temperature—around 320°F (160°C). This allows the heat to penetrate to the center without overcooking the exterior that has already been browned.
This technique is particularly effective for fried meats or roasts. A quick 3-to-5-minute cycle will restore the "just-cooked" texture of the crust while maintaining the internal moisture. For larger pieces, adding a teaspoon of water to the bottom of the drawer can create a small amount of steam that helps hydrate the air, preventing the meat from becoming overly dry during the second cook. This professional approach to leftovers ensures that your high-quality proteins are enjoyed to their fullest potential.
Thermodynamic Calibration of Your Appliance
Not all air fryers are created equal. Some models run significantly hotter than their display suggests, while others have "cold spots" due to poor fan placement. To calibrate your machine, you can perform a simple "toast test." Lay slices of white bread across the basket and run the unit at 350°F (177°C) for three minutes. The resulting browning pattern will show you exactly where the hot spots are. Use this data when placing meat; put thicker cuts in the hottest areas and smaller pieces in the cooler zones.
Understanding your machine’s recovery time is also vital. Every time you open the basket to check the temperature, you lose a significant amount of heat. High-end units recover this heat quickly, but budget models may take a minute or more to return to the target temperature. Minimizing the time the basket is open is a subtle but effective way to maintain a stable cooking environment. Professional results come from knowing your tools as well as you know your ingredients.
Biological Denaturation and Structural Integrity
The science of meat cooking is essentially a study in biological denaturation. When you apply heat, you are changing the shape of the proteins that make up the muscle fibers. If you denature them too quickly, they pull away from each other, leaving gaps where moisture can escape. If you denature them too slowly, the meat can become mushy. The air fryer’s ability to deliver intense heat makes it very good at rapid denaturation, which is ideal for "searing" but dangerous for "slow cooking."
This is why "tempering" the meat before cooking is so important. By bringing the meat closer to room temperature, you reduce the thermal shock that occurs when the protein hits the hot air. This leads to a more controlled denaturation of the protein strands, resulting in a tighter, juicier structure. It is a biological fact that meat cooked from a tempered state retains more of its internal weight (moisture) than meat cooked straight from the refrigerator.
Advanced Fat Rendering at Variable Temperatures
Fat rendering is a time-temperature relationship. While high heat (400°F / 204°C) is great for crisping the very surface, it can sometimes "case harden" the fat, preventing the interior lipids from melting properly. For meats with a heavy fat cap, like a duck breast or a picanha roast, starting at a lower temperature (325°F / 163°C) for the first half of the cook allows the fat to liquefy and move through the muscle fibers.
Once the fat has begun to render, increasing the temperature for the final few minutes will produce that signature golden-brown finish. This staged approach ensures that you aren't just burning the surface fat while leaving the interior layer chewy and unrendered. It is a technique used by professional chefs to achieve that "melt-in-your-mouth" quality that characterizes high-end meat preparation.
Strategic Use of Sugars in Dry Rubs
When applying seasonings to air-fried meat, you must be careful with sugar content. While sugar is essential for caramelization, it burns at approximately 350°F (177°C). Because air fryers move heat so efficiently, a sugar-heavy rub can burn long before the meat is cooked if you are using a 400°F (204°C) setting. If your rub contains significant amounts of brown sugar or honey, lower your cooking temperature to 340°F (171°C) to allow for caramelization without carbonization.
The Maillard reaction and caramelization are two different processes. Maillard requires protein and sugar, while caramelization is just the oxidation of sugar. In the air fryer, you want to prioritize the Maillard reaction for savory depth. If you want a sweet glaze, apply it only in the last 2 to 3 minutes of the cooking cycle. This prevents the sugars from burning while still providing the glossy, flavorful finish that many diners enjoy.
Troubleshooting Common Convection Errors
Even with professional techniques, you may encounter issues as you learn the nuances of your specific appliance. If your meat is burnt on the exterior but raw in the center, your temperature is too high for the thickness of the cut. Lower the heat by 25°F (15°C) and increase the time. If the meat is gray and lacks a crust, the basket was likely overcrowded, or the meat was too wet. Ensure a single layer and pat the meat completely dry next time. These adjustments are the key to continuous improvement in your cooking.
If the meat is dry and rubbery, this is a classic sign of overcooking. Use an instant-read thermometer and implement the pull strategy to remove the meat earlier. Finally, if your seasonings are burning, some spices (like dried garlic or sugar-based rubs) have lower burn points. Try applying these closer to the end of the cooking cycle or lowering the heat slightly. By diagnosing these issues through the lens of thermodynamics and chemistry, you can quickly adjust your technique for future success and repeatable perfection.
Summary of Professional Meat Preparation Workflow
To synthesize these principles into a daily routine, start by identifying the specific requirements of your protein. Lean meats need lower temperatures and protective oils, while fatty cuts can handle higher heat for better rendering. Always preheat and always dry the surface. Use your thermometer as your primary guide, ignoring the clock in favor of real-time data. Account for carryover cooking by pulling the meat early, and never skip the resting phase. This disciplined approach is the hallmark of a skilled cook who understands the power of their equipment.
By following this structured workflow, you ensure consistent, professional-grade results every time you use your appliance. Mastering these variables transforms the air fryer from a simple kitchen gadget into a powerful culinary tool capable of producing world-class meals. Whether you are preparing a simple weeknight dinner or a complex roast, the science of convection remains the same. Precision, patience, and a fundamental understanding of heat transfer are the keys to unlocking the full potential of your air fryer and delivering a 10/10 dining experience to your table.